
This short paper outlines a problem that many users have properly configuring forms to print with custom paper sizes on the 7740. This is largely due to insufficient, outdated or wrong information that is contained on many fora and also in the product’s User Guide. The solution hopefully more clearly states the crucial step or steps in the procedure to do this and how to avoid issues.
The Problem
Users who have purchased and use HP’s OfficeJet Pro 7740 Wide Format All-In-One Printer, from here on known simply as the printer, on claims that it supports wide formats, custom forms and other desirable features, quickly find that there are issues with the documentation. Part of the problem is also due to customer’s misunderstanding, or more precisely their lack of knowledge, of printer paper size, forms and how they map to paper sizes, lastly the proper printer and application configurations to use. This paper hopes to ameliorate this misunderstanding.
This paper specifically deals with the custom form issue, as provided by HP’s HP Smart [1]HP Smart is a product and trademark of the HP Inc., formerly Hewlett-Packard Corporation.application on Microsoft’s Windows 10[2]Microsoft Windows 10 is a product trademark of the Microsoft Corporation, Inc. platform, from here referred to as Windows 10. A user cannot set the printer’s paper size to any strange values and expect the related application software drivers to recognize it by defining any custom form, rather they must first understand that this printer has paper size detection, paper size limits and other constraints. Any one of these may prevent the paper size from presenting itself to the user when they finally try to print, using the form that they may have setup.
The HP application software that were used on Windows 10 platform for this exercise were HP Smart, version 134.1.221.0 and the documentation for HP OfficeJet Pro 7740 Wide Format All-In-One series, User Guide, © 2020 HP Corporation.
A Word About HP Smart
The software solution on Windows 10 that HP promotes and supports, is the HP Smart application. In fact, attempts to install the appropriate drivers to make this device work without using this product, normally end in failure. It has become HP’s go-to all-around solution for it’s printer products and HP has adopted this common application approach for it’s entire printer product line, the 7740 being no exception. In order to do so, it relies heavily on the printer’s auto-detection capabilities for paper size and type, which in some cases can severely confuse the end user. This most often occurs due to a lack of understanding on what is going on under the covers. Otherwise, HP Smart appears to be a very reliable and sound application, with respect to the printer in question.
What About HP Support?
The HP Support Team appears to acknowledge users who have trouble with this printer and custom forms. There are numerous anecdotes and stories that one can find with a simple search. However, most of these issues are sometimes not resolved by the support team, who are most likely not developers and rely too much on the documentation, which as has been already asserted, rather vaguely addresses the issue. When faced with a customer’s constant attention to this issue, support will eventually stop responding, or more likely, the customer politely ends the narrative with thanks for trying to help me. At that point one’s only recourse is to peruse the Frequently Asked Questions, or FAQs, on HP’s Support website, in the hopes for finding an answer to no avail.
HP Applications
As of this writing, the 7740 and newer HP printers no longer have printer device drivers in Microsoft’s Windows Drivers repository, at least none that work very well. Performing any type of Windows Printer Add procedure and a Windows Update, will reveal only back level, non-supported device drivers[3]A Device Driver is not to be confused with the printer’s firmware, which actually works as designed.. The customer is eventually forced to install the HP Smart application, which in turn installs a printer specific application for HP OfficeJet Pro 7740 Series Printing Properties (desktop icon).
The former, requires an internet connection and an HP Smart account for some functions to work, since it connects to HP’s main website to ensure entitlement to software and product support. The latter, controls operating system specific properties, ostensibly those that HP supports for that platform and product.
The User Manual
All of the User Manual material devoted to this subject on pages 33 and 34, indicate that custom forms are supported and work on Windows 10. However, in actual practice, many of the steps or actions pointed out in the material are erroneous, not available (out of date). However, for those who have a development background, have many years of experience with such printers, or can read between the lines; you can be successful at using custom forms.
The first paragraph on Page 33 under Print on special and custom-size paper implies that if one is unable to set the custom paper size in the application, it is somehow the application’s fault. The truth of the matter is, the custom form size was more than likely incorrectly defined.
Before beginning any of the below, the user should understand that Tray 1 of the printer is also called the Main Tray, it is the only one that can accept custom paper sizes!
The Printer – Setting Custom Paper Size
Setting the paper size for the printer (hardware) can be done in one of two ways, both of which successfully set the paper size to custom. Apparently this setting informs the printer’s firmware that an unknown paper size will be used, or one that cannot be properly detected by the hardware, and to accept any paper size overrides directly from the operating system or application. This is very important to understand. You may set the Main Tray to custom and still print Letter or other predefined paper sizes, as long as they are selected in the application during printing.
Unfortunately the Users Manual does not go into the procedure for loading a custom paper size and how to set the display. At least, a quick perusal of the table of contents or the entire document would reveal it as an omission. One can question whether that implies a lack of support. If that were the case, you would think the documentation would be changed to remain the salient sections for such support on the user’s end.
Printer Console Procedure
To set the paper size to custom manually, using the printer’s LCD console display, perform the following.
-
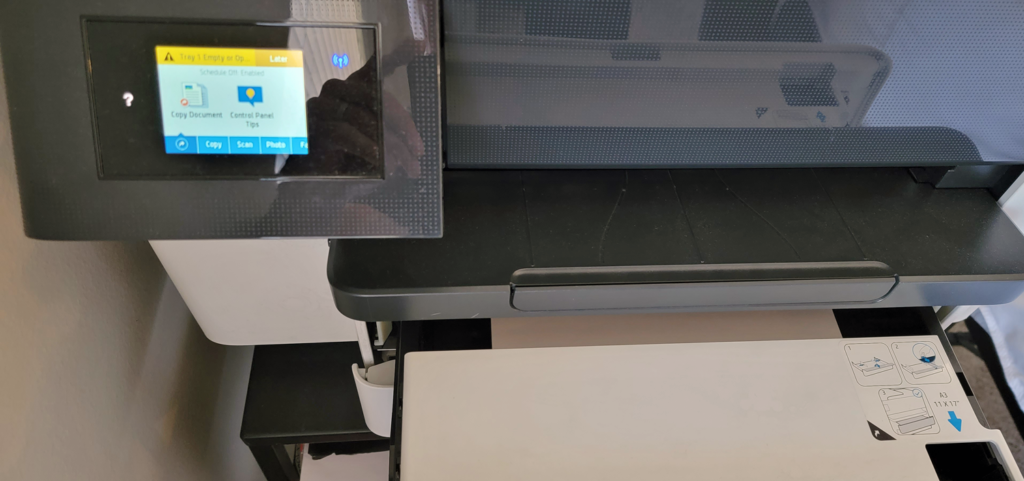
- Standing directly in front of the printer, remove Tray 1 (the top most tray).
- On the display a message will appear indicating the Tray 1 is open.
-
-
Insert your paper into Tray 1, of course it must be one that fits an accepted width of the printer. For this exercise a sheet 8.5” x 40” was used, the paper inserted tight against the front wall of the tray and the remainder hung out of the top of the printer tray.
-
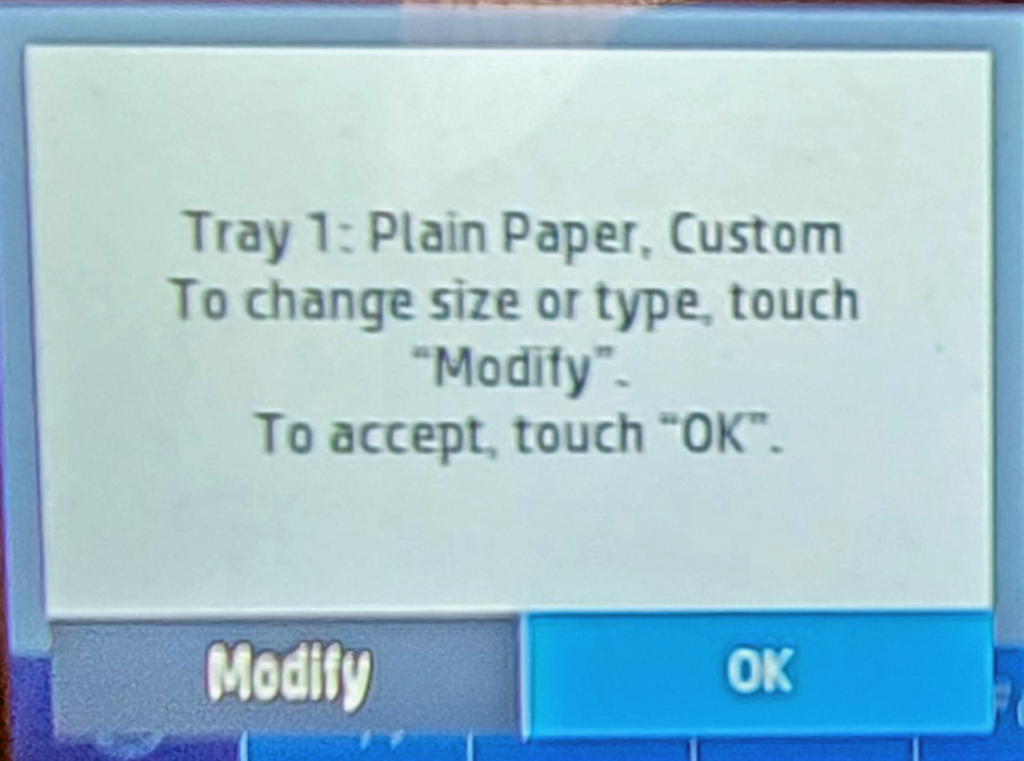
Upon closing the printer tray the console will change and prompt you to change the paper size setting
-
-
-
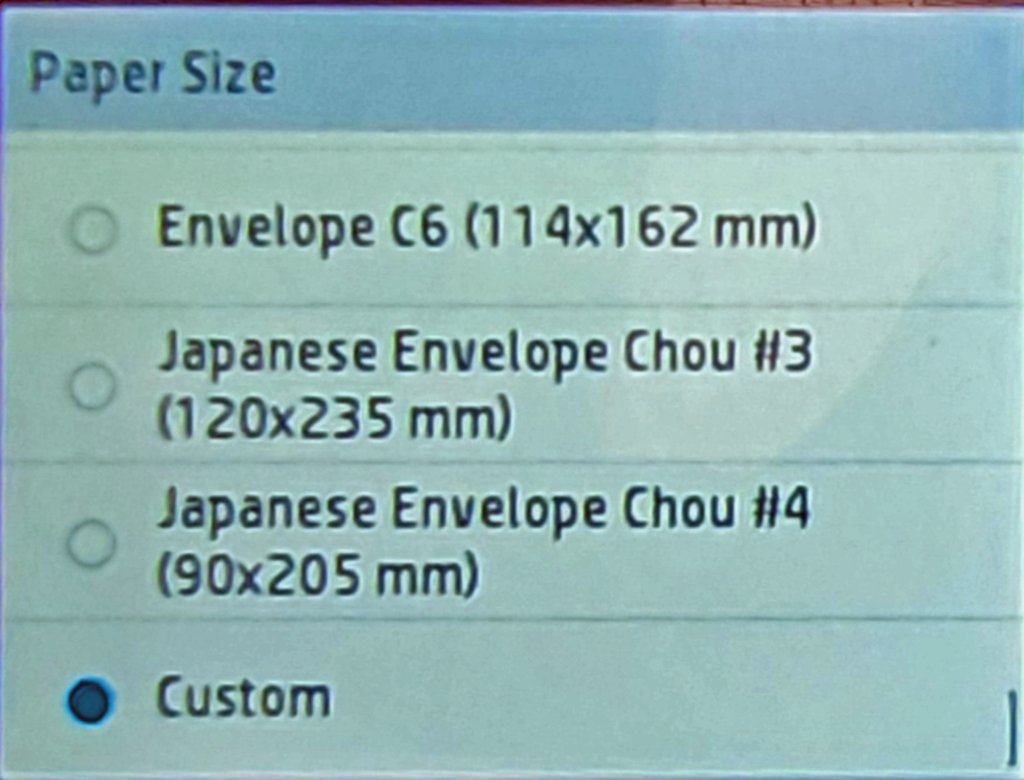
Click on Modify to change the paper size (as you can see it has already been set to custom). The next screen will appear where you can scroll down and select Custom (it was the last entry in the list on this printer).
-
-
-
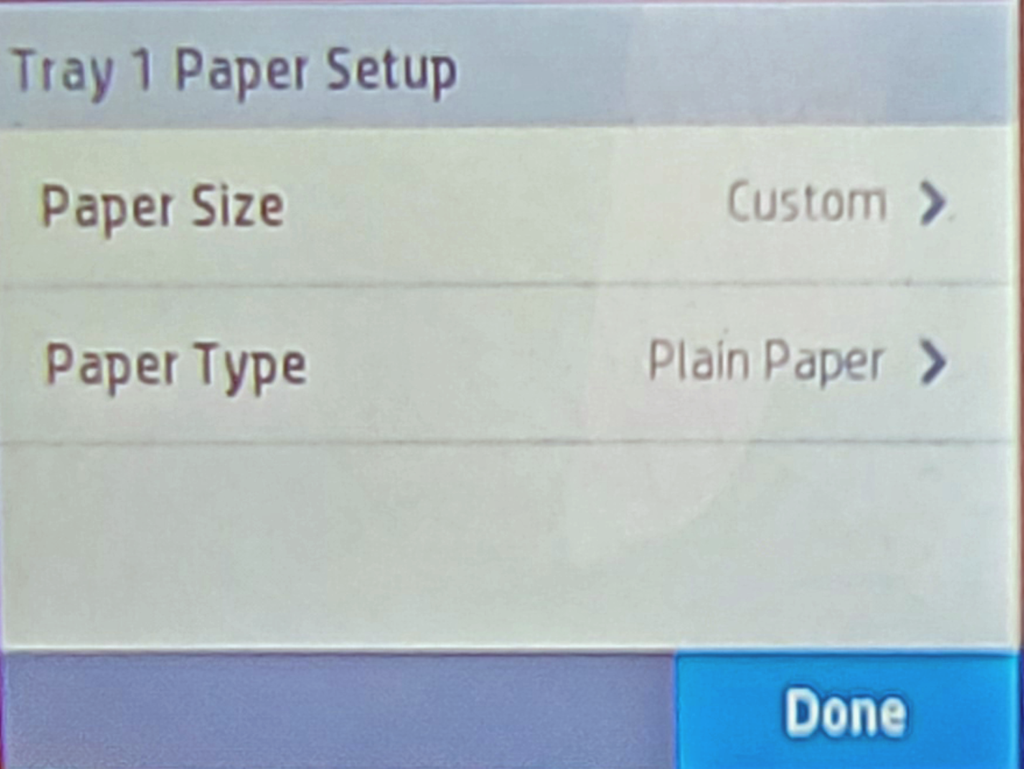
Click on Custom, the display will change so the user can verify all choices and accept them. For this exercise the paper type used was just Plain Paper.
-
-
-
Click on Done. The printer is now set up to accept a Custom paper size for Tray 1.
-
HP Smart Procedure
To set the paper size to custom, using the HP Smart application on Windows 10, perform the following.
-
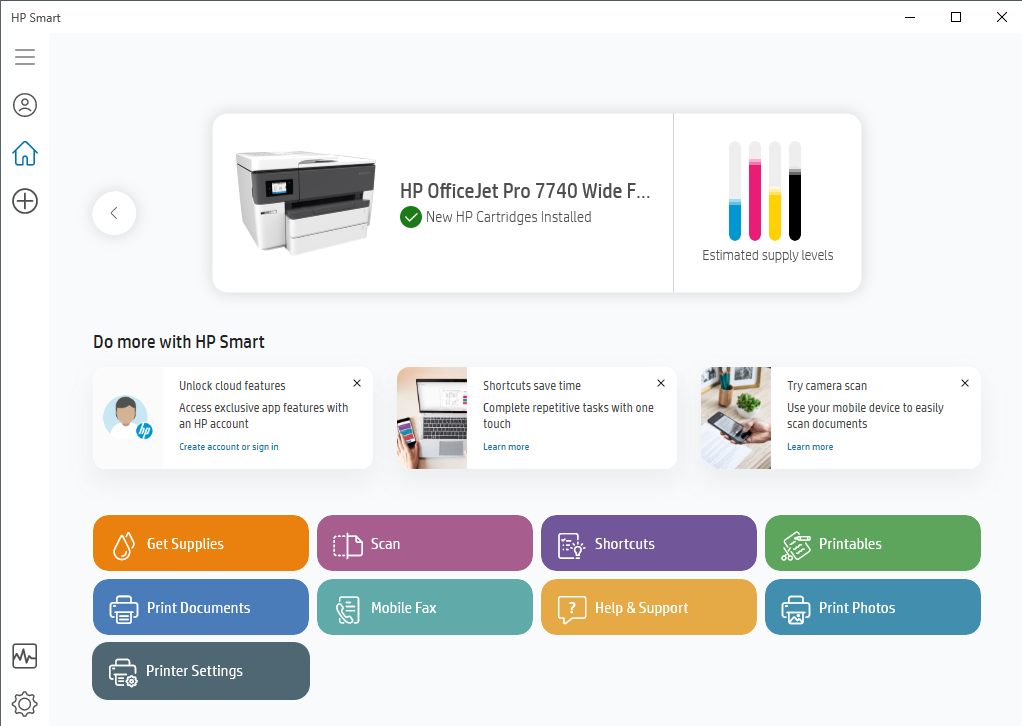
- From double-clicking the desktop icon or by selecting Start → HP Smart, start the HP Smart application. The application below should appear.
-
-
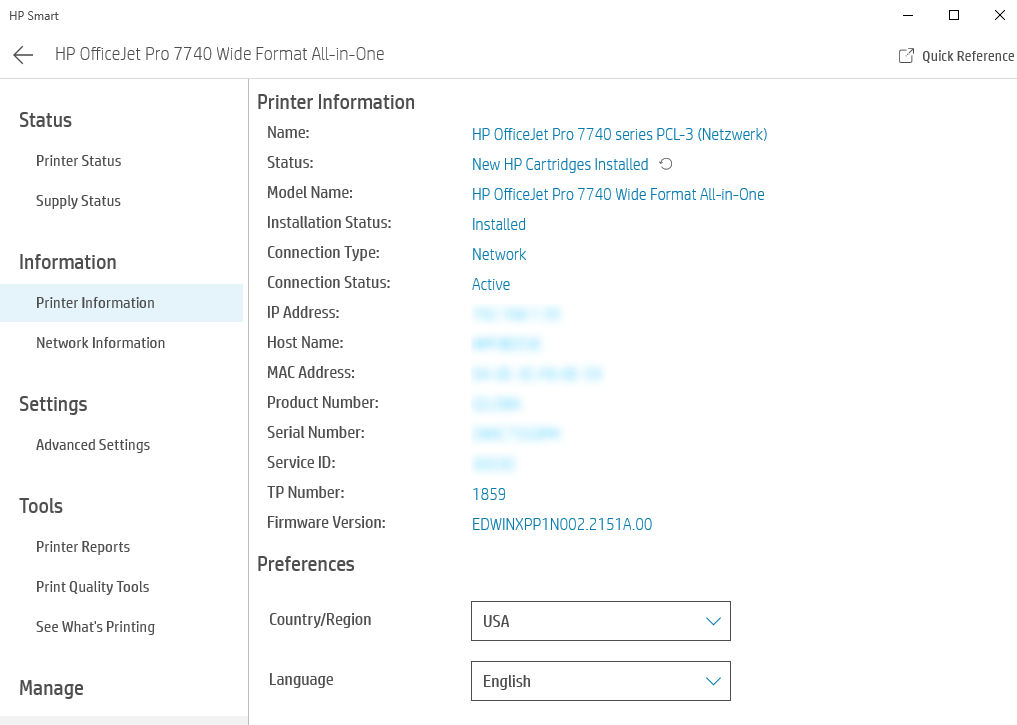
Click on Printer Settings, the dialog below will appear, showing current printer settings (some have been blurred for security).
-
-
-
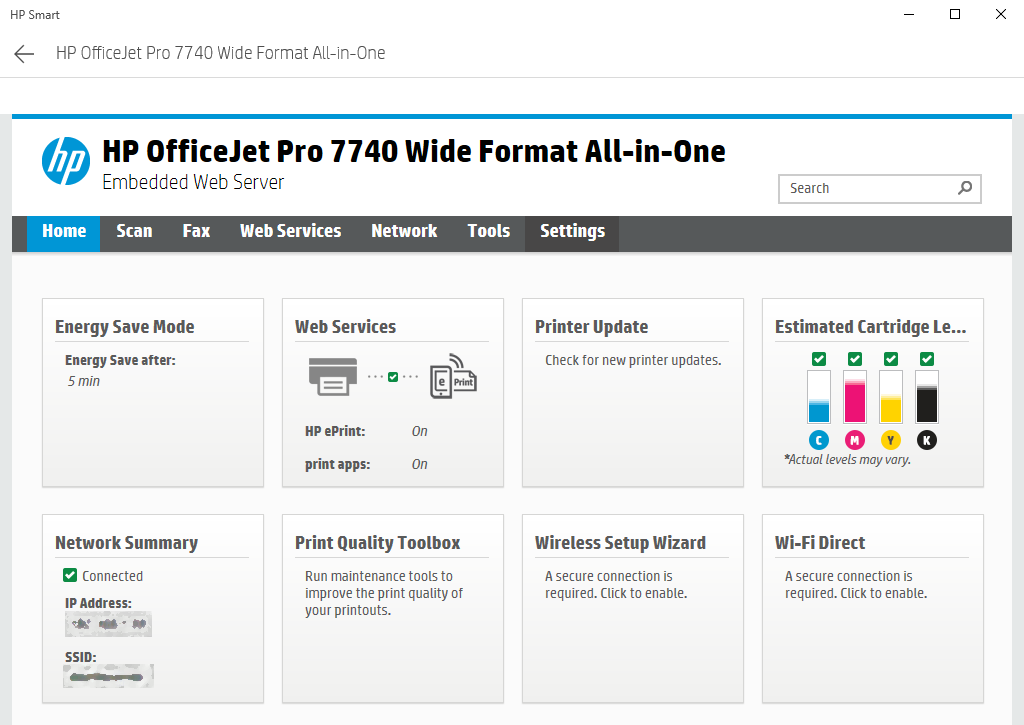
Click on Advanced Setting, the dialog below will appear.
-
-
-
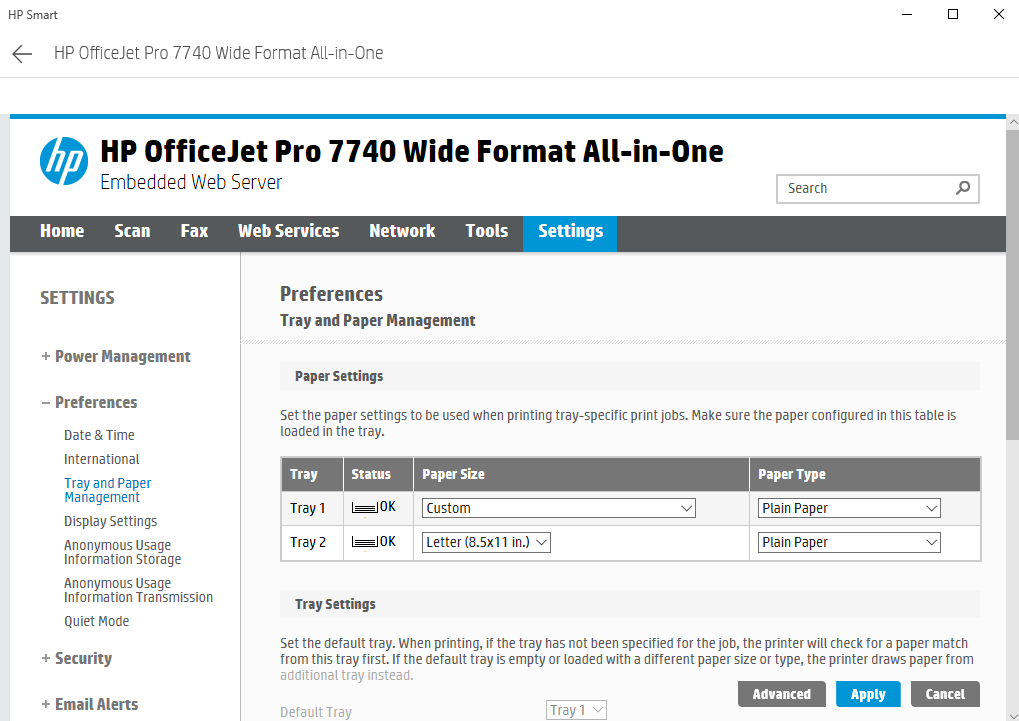
Click on Settings, the dialog below will appear.
-
-
-
Under Preferences, click on Tray and Paper Management, the dialog above will change to show the current Tray settings for the printer. Using the pulldown, set the Paper Size to Custom.
-
Click Apply and close the application, if no other changes are needed.
-
Application – Setting Up Custom Forms
Setting up customer forms is the most important setting. However, the instructions that are in the User Manual need an apparent refresh.
Understanding Custom Form and Printer Paper Size
The user must first understand the relationship between the custom form size and the paper size that will be used. To explain this, it is probably best to demonstrate with an example.
Given a printer job that requires a banner to be printed on piece of normal paper cut from a roll of paper and that measures 8.5 inches high by 40 inches long, we can think of this in two different ways.
-
- 40 inches wide x 8.5 inches high
- 8.5 inches wide x 40 inches high
As can be seen by the two measurements above, they appear to be the same; and for most practical purposes they are. However, upon closer inspection the user should recognize that the printer in question cannot handle a paper which is 40 inches wide; but it can handle a paper that is 8.5 inches wide and very long. Therefore, when defining the custom form for this particular job, there is really only one solution.
-
- Width: 8.5”
- Height: 40”
The next consideration will be determining how the banner is printer on a paper of the above size. Since our test banner in the illustration above requires it be read lengthwise, the following additional paper property must be considered when printing.
-
- Paper Orientation: Landscape
Procedure To Correctly Set A Usable Form Size
Once the above decisions have been made, it is a straightforward matter to map the above values into a custom form and the correct paper size and orientation when printing.
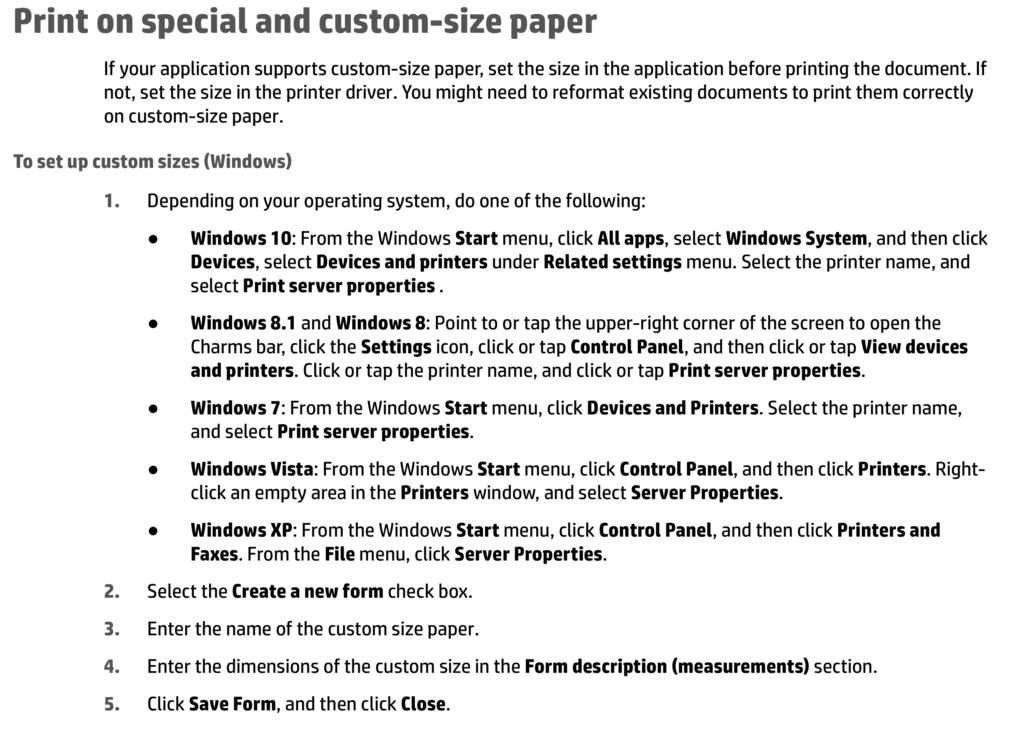
On page 33 there are very specific steps to set up custom forms on Microsoft Windows. They are still valid on Microsoft Windows 10, but with the following modifications.
-
- Depending on your operating system, do one of the following:
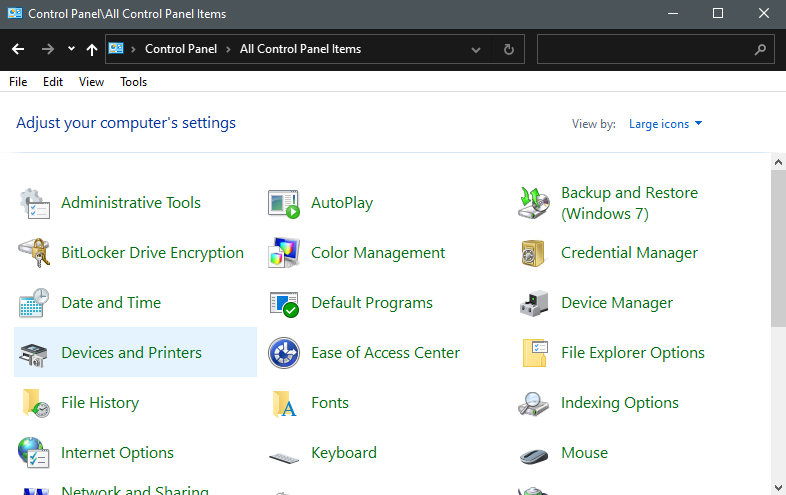
- Windows 10: From the Windows Start menu, mouse over to the applications listed on the right, scroll down to Windows System, right-click to expand, select Control Panel.
- Depending on your operating system, do one of the following:
-
-
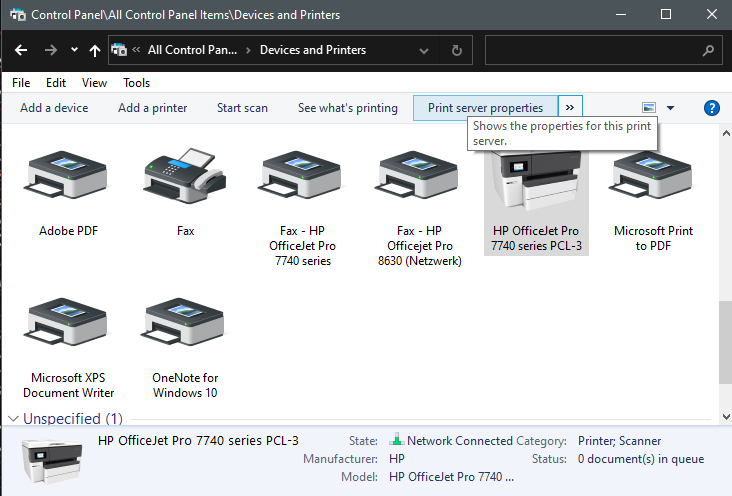
- From Control Panel, click Devices and Printers, find the HP 7740, then select and click on the Print server properties on the second menu bar.
-
-
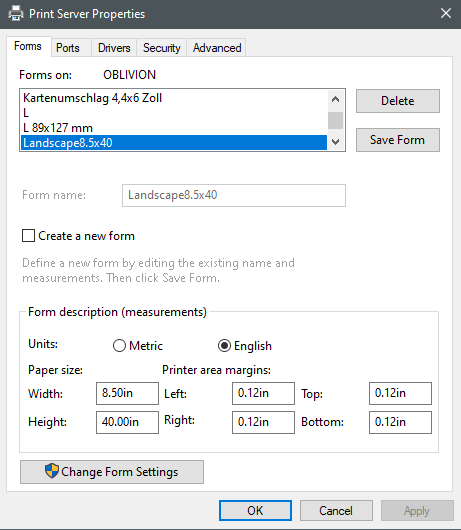
- The Print Server Properties dialog is displayed below. Check the Create a new form box.
- Enter the new Form Name for the custom paper size. For this example, the following were used:
- Form name: Landscape8.5x40
- Width: 40”
- Height: 8.5”
- Printer Area Margins: 0.12” (or something similar, for all four settings)
- Enter the dimensions of the new paper, along with the printer margins to respect in the Form description (measurements) section.
- The Save Form button will be highlighted once information is added, click on it to save the form, then press Close
-
- In the example above, a custom form for a long piece of paper that was cut from a roll of 8.5 inch paper and fed into the Main Tray, also known as Tray 1 (the only tray that supports custom paper sizes), was used. At this point, the custom form has been created successfully.
With the printer paper size now set to custom and a custom form size that is properly set, it should now be an easy matter of using both of these to print the project. If the new custom form size does not appear in your application’s printer paper size as an option when printer, the most likely cause of this is an invalid custom form size.
Application – Using and Printing with Custom Paper Sizes
This section details efforts to test whether or not documents can actually be printed using the new custom forms.
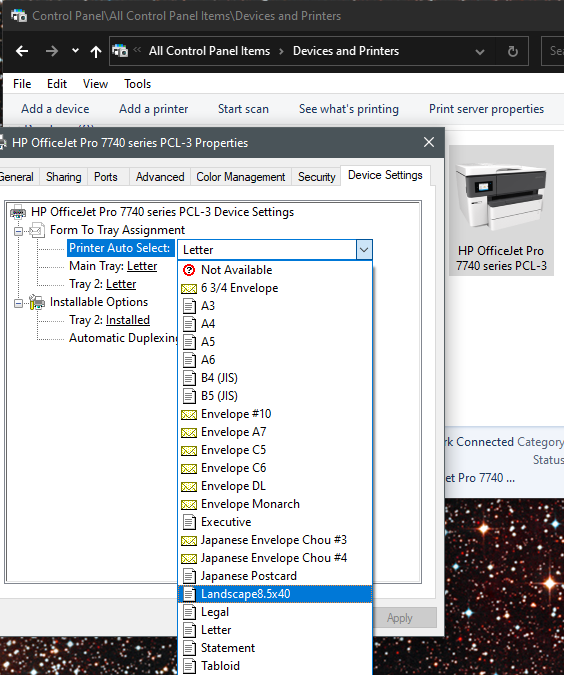
Custom Form Check in Device Setting
As a separate exercise, an easy check to see if the new form will be used by the printer driver, one can easily try and set the default printer properties dialog.
-
-
-
-
-
-
To see if the printer driver that was installed by HP Smart will actually detect the new form, we can attempt to adjust the default paper size to use it.
-
As can be seen by the pull-down above, the new custom form size that was created is shown as an option in the list. Checking all other applications, for example Adobe Reader, will lead to similar results.
-
-
-
-
-
Setting Up Printer Properties for Custom Form Sizes
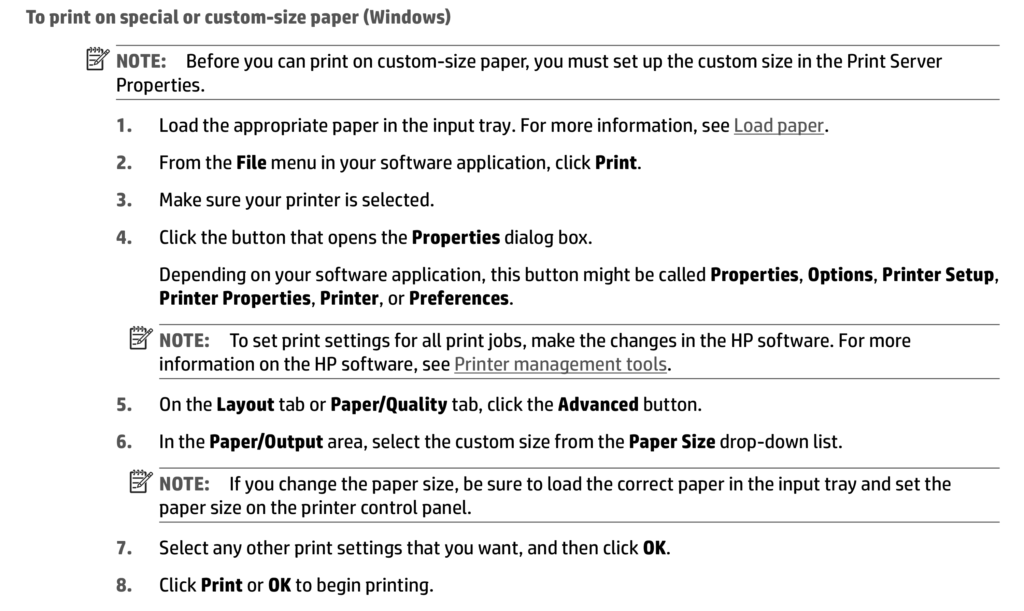
Regardless of trying to set the default device properties as previously demonstrated, a walk through of the current Users Manual write up on how to use the new custom form must be undertaken. The User Manual states the following on Page 34 for printing with custom paper sizes. This appears to work as written and the user should have no further problems, with the possible exception of forgetting to load paper of unusually long lengths manually. In such instances, it is best to leave paper Tray 1 empty each time, since the printer will remind the user that paper is missing if an attempt is made to print without any.
References